Happy New Year! Below are the instructions for this month’s Grab & Go kits! Grab one at our outdoor Creation Station or stop by the Youth Department. While supplies last.
PLEASE PAY ATTENTION TO THE NEW GRADE RECOMMENDATIONS!
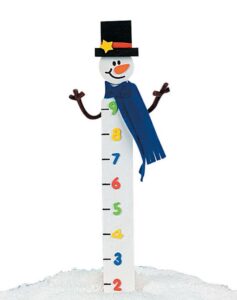
Our Pre K-Kindergarten craft is a fun snowman ruler. Whenever it snows this year, have some fun and go outside to see just how much snow has fallen! You can even use it a couple of times while it is snowing to see how fast the snow is accumulating. Make educated guesses about where there might be more snow, like where someone had to plow or shovel to clear a sidewalk.
The instructions for the snowman ruler are included in the craft kits!
Books on Snowmen:
- Winter by Harriet Bundle
- Case of the Sneaky Snowman by Carolyn Keene
- Max & Mo Make a Snowman by Patricia Lakin
- Ty’s Travels: Winter Wonderland by Kelly Starling Lyons
- Choose Your Own Adventure: The Abominable Snowman by R.A. Montgomery
- Snowman – Cold = Puddle: Spring Equations by Laura Purdie Salad
- In the Snow by Elizabeth Spurr
- We Want Snow! A Wintry Chant by Jamie A. Swenson
- Some Snow Is… by Ellen Yeomans
Books on Math:
- I’m Trying to Love Math by Bethany Barton
- How Many Flamingos Tall is a Giraffe?: Creative Ways to Look at Height by Clara Cella
- Isobel Adds It Up by Kristy Everington
- The Last Marshmallow by Grace Lin
- 1 Big Salad by Juana Medina
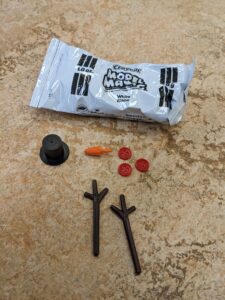
Kids in grades 1-4 can create their own snowman out of air dry clay! Each kit includes a hat, two arms, a carrot nose, and three buttons. The hats and buttons may vary by kit and might not match the supplies I show.
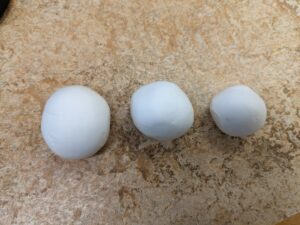
First, take out your air dry clay from the wrapper. Then separate it into 3 parts. You can create one small, one medium, and one large piece. Or you can keep them all the same size, whatever you’d like to do. After that, roll each of the three pieces into balls. These will be the snowballs that create your snowman!
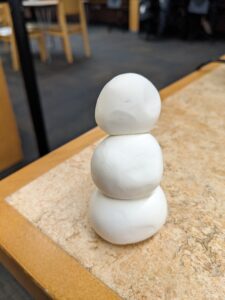
Then stack your three balls together. I put my largest ball on the bottom and my smallest ball on top to create the head.
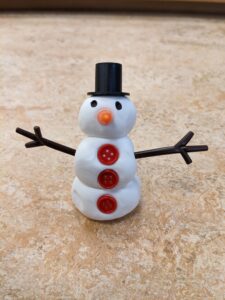
Next, you’ll start attaching the other pieces! Put the arms into the sides, the buttons down the front, the carrot nose into the head, and then the hate on top. I also used a marker to create my snowman’s eyes.
Now you have a snowman! It will take a few hours for your clay to dry. So you can leave your snowman to dry and set. If you want to make any changes, you’ll want to make them fast while your clay is still soft.
Hope you all have fun in the snow this winter!
Books on Snowmen:
- Winter by Harriet Bundle
- Case of the Sneaky Snowman by Carolyn Keene
- Max & Mo Make a Snowman by Patricia Lakin
- Ty’s Travels: Winter Wonderland by Kelly Starling Lyons
- Choose Your Own Adventure: The Abominable Snowman by R.A. Montgomery
- Snowman – Cold = Puddle: Spring Equations by Laura Purdie Salad
- In the Snow by Elizabeth Spurr
- We Want Snow! A Wintry Chant by Jamie A. Swenson
- Some Snow Is… by Ellen Yeomans
Books on Math:
- I’m Trying to Love Math by Bethany Barton
- How Many Flamingos Tall is a Giraffe?: Creative Ways to Look at Height by Clara Cella
- Isobel Adds It Up by Kristy Everington
- The Last Marshmallow by Grace Lin
- 1 Big Salad by Juana Medina
Want to make more things with air dry clay? Check out Clay Lab for Kids: 52 Projects to Make, Model, and Mold with Air-Dry, Polymer, and Homemade Clay by Cassie Stephens
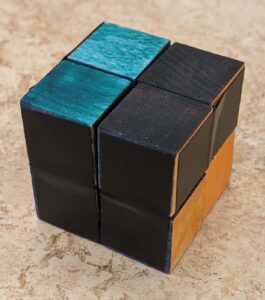
Make your own fidget cube!
Supplies included in kit:
- 8 wooden cubes
- 1 roll of electrical tape
Supplies needed:
- Scissors
Optional supplies (for decorating your cube):
- Permanent marker
- acrylic paint
- Washi tape
- Printed photos
- Glue or double sided tape
Instructions:
Follow any of these video tutorials. I recommend coloring each side of the cubes with paint, markers or washi tape to help with construction. Some videos show you how to make your cube into a photo cube instead of just a fidget. For that you will need the last two items in the optional supplies list.
Tip: go to settings on the youtube videos and set playback speed to 0.5 or 0.75 so you can watch the steps closer. You may have to rewatch certain parts a few times.
- https://www.youtube.com/watch?v=CERu3MsUYc8
- https://www.youtube.com/watch?v=7pEOGPH9y_c
- https://www.youtube.com/watch?v=lmwBLHAqbWg&t=839s

